We have bought are own site so we can offer even more free stuff. All information on this site and alot more is now on http://www.4sidedpolygon.com/
Wednesday, April 30, 2008
Tuesday, April 1, 2008
Making new pictures look old
Labels:
black and white photos,
blimishing,
photoshop,
sepia tone
This tutorial demonstrates how to make a modern digital image look old. We will be going through all of the step and techniques in photoshop to give same wear and tear of the second image. Below is the the before and after results. 
 First, find an image to use or feel free to use the image at the top of this tutorial.
Next, open the image in any Photoshop.
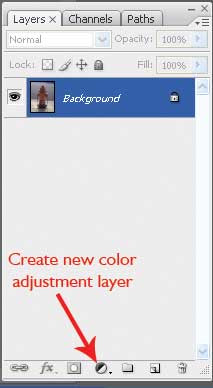
To start with we are going to pull out all of the color and bump up the contrast of our original image. Since we will be using a few different photoshop layers make sure layers are visible by going to Window>Layers in the photoshop menu at the top of the screen. This will show the layer pallette if it isn't alreay showing.
In the layer pallette select the Create new color adjustment layer icon like in the image below.
The adjustment layer will be a Hue/Saturation like in the image below.

In the Hue/ Saturation menu set saturation to -100 like below. After adding the hue/saturation layer add another adjustment layer like before and select Brightness/Contrast with the settings in the figure below.
 Now we will be adding a couple of color layers to give it an old sepia tone like in old photos.
Add a new empty layer by going to Layer>New>Layer in the top menu or the create new layer icon in the layer pallette. Use the paint bucket tool to fill in the layer with the color below. Now, duplicate the layer by going to Layer> Duplicate Layer in the top menu. Go to the layer pallette select "Layer1" and change the blending mode from Normal to Overlay and the Opacity should be brought down to 50%. (Shown on the left side in the below image)
Select the "Layer1 copy" and change it's blending to Color and it's opacity to 75%.(Shown on the right side in the below image)

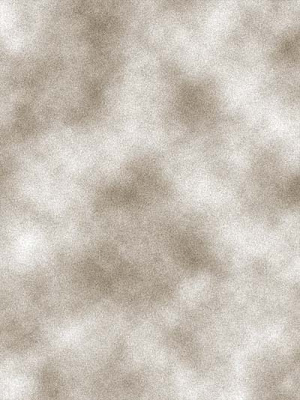
Now duplicate the top layer and go to the color picker in the tool menu. Keep the tan color for the foreground and pick white as the background color. Go to Filter>Render>Clouds . This will help add some wear and tear on the image.
In the layer pallette select the cloud layer and change the blending mode to multiply and opacity to 50%.
Next, select the cloud layer and go to Filter>Noise>Add Noise with the settings below. This step adds the film grain effect. Look at the second image (This image is prior to the blending and oppacity change)

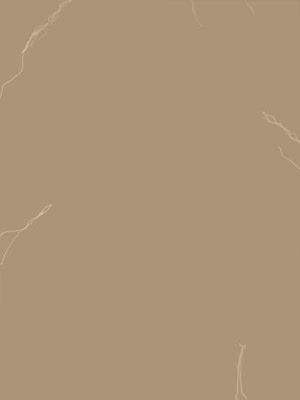
 Add a new empty layer by going to Layer>New>Layer. This will be used for dust and scratch marks. In this layer use a few small brushes to add small white dots and slightly yellow marks around the layer. In the image below the tan background is just for demonstration. Blending and opacity can be kept as default for this layer.
Create on last empty layer like in the previous step. This layer is for some fold marks within the image. To do this use a small tip brush of 1- 3 pixels and make lighting shaped lines near the corners. Then go back over with a small eraser (5-10 pixels soft brush ) to break up the lines a bit. When satisfied with the lines go to the layer palette and bring the layer's opacity to 85%. Use the below picture as reference.
 At this point, the image should look like the second image at the very top of the tutorial. For further experimentation change the adjustment Layers and color layer settings for other worn image effects.
Thank You For Reading.......................
Subscribe to:
Posts (Atom)